
Sniffing CMOS camera initialization sequence!
über
Yesterday at work i did a really cool thing with the new Hex View feature of ScanaStudio, and I though i would share that with our readers! I used ScanaStudio to write a CMOS camera initialization function in minutes instead of hours!
Some background
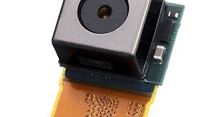
I am working on an electro-medical project for a client where a sub miniature camera is used to capture some images. Due to some confidentiality agreements here and there, I can’t give any
specifics about the model of the camera that is used, but that’s not the subject of this article anyway. The thing is, i had very, very little information about how to initialize the camera. I am pretty sure many of those of who will read those lines have already came across this problem: poor, neglected datasheets!
The problem
Fortunately, I was given a USB an evaluation kit of this camera, that can be used to initialize the camera and then capture live video stream out of it. I used ScanaPLUS to capture all the activity on the I2C lines where all the initialization occurs:

Zooming on one of the tiny vertical lines, we can see those are I2C packets:

The problem is, there’s a LOT of those I2C packets. Actually there are 95 I2C commands that are sent to the camera during that initialization sequence. I really didn’t want to copy paste hundreds of bytes, one by one into my code to build my own initialization sequence, and here came the solution, the “HexView”.
The Solution
Using the “Hex View” option, and setting the number of bytes per line to 4, we can get a beautiful listing of the commands. You may need to adjust the “Skip bytes” feature in order to align the bytes in the right order:

Then, you can right click on the Hex bytes and click: “Copy text as: Hex data”. The result will look something like this:
…
6a 37 02 01
6a 37 03 00
6a 30 12 00
6a 35 13 c0
6a 35 05 25
6a 40 02 01
…
Each one of the above lines represents the camera write address (0x6A), the 2 bytes address (like 0x37 0x01) and the data byte to write at the end.(The list above is of course only a part of the full sequence)
Using the great notepad++, we can setup in 2 seconds a macro to transform that list into a C code array:
const uint8_t cam_ini[] = {
		...
		0x6a,0x37,0x02,0x01,
		0x6a,0x37,0x03,0x00,
		0x6a,0x30,0x12,0x00,
		0x6a,0x35,0x13,0xc0,
		0x6a,0x35,0x05,0x25,
		0x6a,0x40,0x02,0x01,
		...
		0x00,0x00,0x00,0x00 //this marks the end of the table
};
Note: I added a line with all zeros at the end of the table to mark the end of the init sequence, this will be useful in the last part of this tutorial.
Now, and finally, in order to send the I2C initialization sequence to the camera, a simple C routine like this can do the job:
ini_ptr = (uint8_t*)&cam_ini[0];
while(1)
{
	if ((*ini_ptr) == 0) break; //ini sequence done
	i2c_write((*(ini_ptr+1)),(*(ini_ptr+2)),(*(ini_ptr+3)));
	ini_ptr += 4;
	Pause(); //add some micro seconds of delay
	Pause();
	Pause();
}
Conclusion
Using this technique (combining a ScanaPLUS logic analyzer and the ScanaStudio software), I was able to very quickly duplicate an initialization sequence of a CMOS camera sensor and integrate it in my source code. Very similar approach can be used to further accelerate product development in many fields, like audio amplifiers (that are also I2C controlled).
Source: Ikalogic
Diskussion (0 Kommentare)