
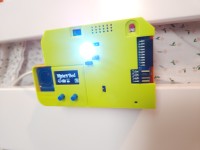
STM32WB5MM-DK Bunkbed Control Unit
STM32WB5MM-DK project that takes advantage of most of the onboard sensors and capabilities to control a set of lights for a bunkbed. Two of the lights are controlled via relays while the other two are RGBW LED strips. In addition the DFRobot offline voice recognition voice module is used.
This project attempts to use a STM32WB5MM-DK as a bunkbed control unit. I've taken the different sensors on the board and repurposed them where possible to take on this role.
The STM32WB5MM-DK is a powerful board as it is but when these sensors are used for this purpose they add a lot of value to the user experience:
- RGB LED - able to be used to indicate the color the kids are setting the light to for a quick glance without needing to look up at the lights
- ToF sensor - setup as an interrupt to wake the screen on sleep for a period of time if someone comes into the room
- Gyroscope - setup as an interrupt to detect motion in the event a kid is getting out of bed or if they have crept up on the side of the device (so no ToF interrupt) and touch a button moving the device enough to trigger it
- Screen - I'm using it to display information about the rooms being affected and to show some cute icons for my kids to enjoy
- Two buttons on the front - Using to toggle through the display screens
- Touch button - short press used for toggling colors, long press toggling on and off, if done on the main screen turns all lights on or off together
- Temperature - used to indicate the temperature in certain screens
- BLE - used to control the lights turning on and off from the adafruit bluefruit phone app
- i2c - using to interface with the DFRobot voice recognition module for voice control elements, using custom learned words to switch to the different rooms
Sensors I didn't use:
- PDM mic - I was unable to get the mic working at this time but I wanted to use the DFRobot module I had on hand for this task so I wasn't that disappointed
- Infrared LED - I used no use for it
I've setup a youtube playlist showing several different elements of the bunkbed control unit: https://www.youtube.com/playlist?list=PLmOy82pCgLFnNTYIIiNuwe8WrI0cX0uUq at this time I decided not to show my girl's room as my wife is still working on a mural in there (so unfinished) and for the girl's privacy. One of the videos explains the protoboard setup as well and how I went about getting it together.
Protoboard information:
- The device itself is 12V capable from the VIN so a USB PD spoof from WeAct was used here set in the 12V configuration. I did this such that I could use the associated headers to provide 12V to my relay for use with my lights. In addition the board itself is capable of 12V from the VIN so I was able to use this as an input. I was pleasantly surprised when I looked at the schematic and I saw the 800ma 5V linear regulator present there: LD1117S50TR it takes 5V - 15V.
On the protoboard I also included a 5V regulator that could handle larger amperage and also included a capacitor to help with the LED lighting. I didn't want to pull too much from the onboard regulator so I included a WeAct SY8205 allowing for larger loads.
In addition to that I soldered some grove HY 2.0 4P headers to my protoboard with a normal grove analog configuration where 4 of the analog inputs are attached. I only needed two of them but figured this would make the protoboard more useful in the future as it allows for more uses of those inputs. I also attached one HY 2.0 4P to the i2c bus figuring I could use an extender if I needed more in the future but for now this allowed the DFRobot offline voice recognition module to be connected. There are also two 2 pin screw connectors I setup to allow me to connect the LED lights (with the VCC and GND shared between each and a separate analog pin for each of the data lines).
In general it's a pretty simple protoboard that seems a lot more complex by the need to wire a bunch of wires all over the place for things to fit nicely. I plan on making a PCB in the future which should simplify this considerably.
My repository has been included here but in addition it can be found at: https://github.com/Cosmic-Bee/stm32wb5mm-dk-bunkbed-control-unit/
An aside: I was able to help contribute to figuring out how to use the touch button with STM32Duino as seen in this issue: https://github.com/stm32duino/Arduino_Core_STM32/issues/1098#issuecomment-1915859786 I would have been pretty disappointed if I failed to get that button working as I feel like it really adds to the experience given the girls can do short or long presses for light control with it. It was a new experience for me as I've never used this type of touch button before but was glad I was able to figure out the proper manner to read its state.
It was very useful to have the schematic on hand when working with the sensors to figure out the right pins to use and to get things configured: https://www.st.com/content/ccc/resource/technical/layouts_and_diagrams/schematic_pack/group1/0a/d5/78/b6/d7/bd/45/de/mb1292_shematics/files/MB1292-WB5MM-B01_Schematic.PDF/jcr:content/translations/en.MB1292-WB5MM-B01_Schematic.PDF
I enjoyed working with this development kit. I do wish there was more documentation around using some of these elements of the board but I love how the company is making an effort to get these out to developers to build unique things with them.
Diskussion (0 Kommentare)