Unlike the Arduino IDE, which is based on C/C++, GCBasic offers a simpler and more readable syntax, making it particularly accessible to beginners.
Using Great Cow Basic to program an Arduino
Why use this software?
Great Cow BASIC (abbreviated as GCB or GCBasic) is an open source compiler that allows you to program PIC (Microchip) and AVR (Atmel/Microchip, including the ATMega328P in the Arduino Uno) microcontrollers using a language similar to BASIC. GCBasic is particularly accessible to beginners. GCBasic is complemented by GCBGraphical, a development environment that makes it easier to write programs thanks to a user-friendly interface combining BASIC code and visual elements. It can be compared to Flowcode, but in a lighter and completely free version. Suitable for simple applications and beginners, GCBGraphical is an excellent starting point, but quickly gives way to GCBasic for more advanced projects. Unlike MPLAB X, MikroBasic, or Flowcode, GCBasic is completely free and license-free, with an active community that shares examples and libraries (though smaller than that of the Arduino ecosystem). The software is also available for Linux and Mac. Programs can be written in a simple text editor: the BASIC code is then converted to assembly language and compiled into a .hex file. This is uploaded to the microcontroller using tools such as Pickit (PIC) or avrdude (AVR/Arduino). In GCBGraphical, these steps are automated for simplicity.
Its only equivalent is PICAXE Editor, but this requires proprietary microcontrollers (PIC microcontrollers programmed with a bootloader). In summary, GCBasic is ideal software for teaching and learning about microcontrollers, but also for easily carrying out practical electronics projects.
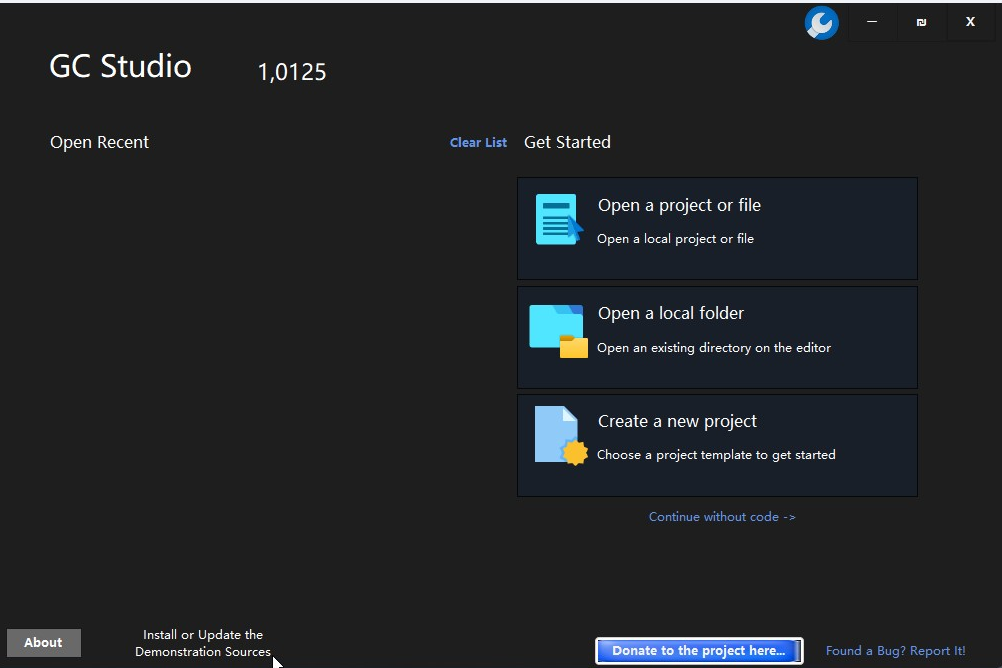
To install GCBASIC, go to the official website https://gcbasic.sourceforge.io For Windows, download GCStudio IDE - v1.xx.xx (September 2025, this is pack 1.0125). After installation, launch the GC Studio software. Also request the sample files.
Depending on your system, choose the Auto or x86 (32-bit) or x64 (64-bit) architecture.
Create a new project and save it in a folder that is easy to find. Choose GCB Microcontroller Single File Program.
The Arduino UNO board in the world of Great cow Basic
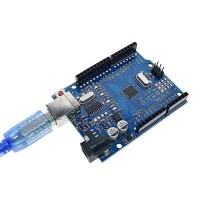
Great cow Basic uses the technical configuration of many types of microcontrollers (mainly Microchip PICs and Atmel AVRs). The ARDUINO IDE associated with the ARDUINO board uses specific numbering, assigning numbers from 0 to 19 to digital pins 0 to 13 and numbers A0 to A5 to analog pins. GCB directly manipulates the microcontrollers' hardware ports (PORTB, PORTC, etc.). The basic Arduino Uno board uses an Atmel Mega328p clocked at 16 MHz. The ATMega328p microcontroller contains a bootloader that allows downloading (or uploading in the Arduino world). GCB uses the avrdude program to upload the program. The Arduino IDE also uses avrdude internally, but this is transparent to the user.
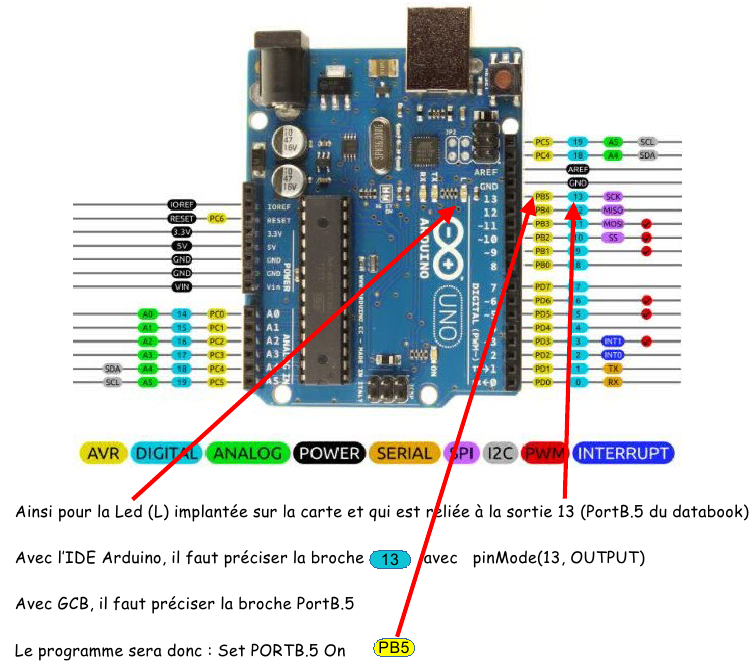
The Arduino Uno board has numerous input/output ports numbered from 0 to 19. The pin nomenclature is slightly different between the Arduino IDE and GCB. To summarize: Arduino IDE → easy and uses Arduino pin names. Great Cow BASIC → more technical: uses the microcontroller's ports and bits.
To test all of your equipment (software and Arduino board), we will test our first program. When you start GCBasic, select Open a project or file and locate uno_blink.gcb (don't forget to install the demo files) in C:\GCstudio\gcbasic\demos\Vendor_Boards\UNO_arduino_board
I recommend saving it in a specific file/folder (e.g., 1GCB_blink) so that any changes you make will not affect the original demo file.
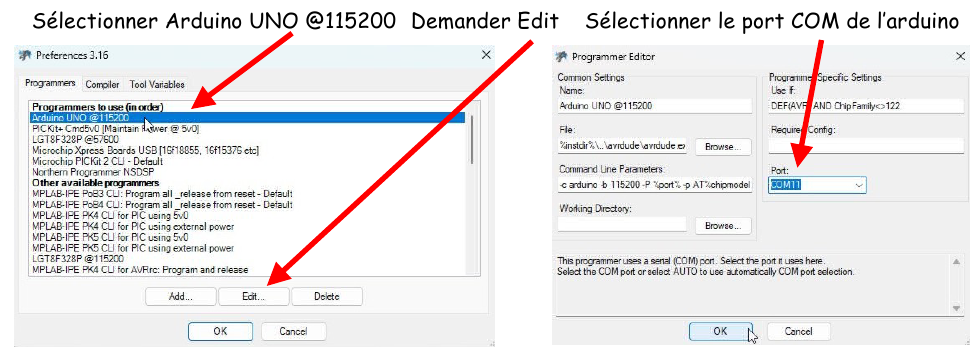
The .hex file download must be configured for the Arduino board: Select Show task menu Request Edit Preferences User The Basic code is :
'''******************************************************************
'''@Carte Arduino Uno mega328p 16MHz
'''@author Thierry LANCELOT
'''@date 25/08/2025
'''******************************************************************
'''Blink.gcb '''Test simple clignotant Led de la carte UNO
'''******************************************************************
;Definition du Chip
#CHIP mega328p, 16
#OPTION Explicit ;oblige a declarer toutes tes variables, c'est plus prudent...
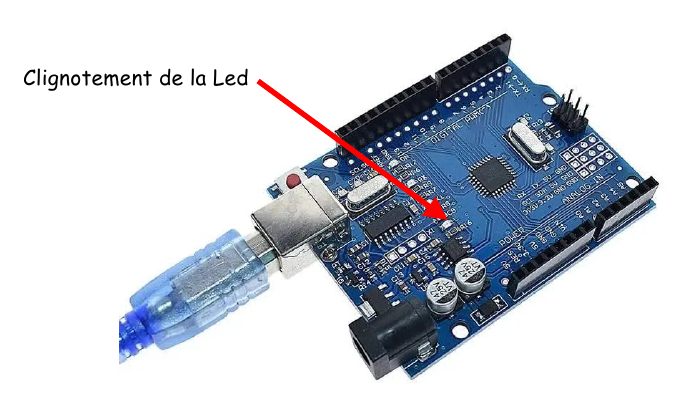
;Definition de la LED interne de la carte UNO
#DEFINE LED PORTB.5
Dir LED Out
Do LED = !LED Wait 1 s
Loop
To test the Blink program, simply click on Make Hex and Flash.
The BASIC code is then converted into an assembler file (.asm) and compiled into .hex. Next, the avrdude software automatically uploads the program to the Arduino UNO board. If everything goes well, the Arduino's internal LED will start flashing. The GCBGraphical terminal displays the compilation and upload messages, confirming that the operation was successful.
Let's analyze the Basic Blink program:
#CHIP mega328p, 16 indicates that we are using an AVR ATmega328P circuit clocked at 16 MHz. #OPTION Explicit requires all variables to be explicitly declared (with Dim), making the code safer and more readable.
#DEFINE LED PORTB.5 allows a symbolic alias by associating LED with PORTB.5
Dir LED Out indicates that LED is used as an output, therefore PORTB.5 is used as an output The main program is located in the “Do Loop” loop
LED = !LED reverses the logical state of the LED. Line identical to LED = Not LED
Das Elektor Magazine gehört seit 65 Jahren zu den führenden Informationsquellen für Elektronikingenieure, Entwickler, Start-ups und Unternehmen. Unser Magazin wird von einer aktiven Community aus Elektronikingenieuren – von Studenten bis zu Profis – getragen, die mit Leidenschaft innovative Ideen entwickeln und teilen.
Für diese veröffentlichen wir jedes Jahr Hunderte von Beiträgen in Formaten wie Artikeln, Videos, Webinaren und weiteren Lernformaten. Unsere Mission ist es, Wissen auf jede mögliche Weise zu teilen und die Leser mit den neuesten Entwicklungen im Bereich der Elektrotechnik zu inspirieren.
Vielen Dank für Ihre Bewertung!
Kommentar hinzufügen
Vielen Dank für Ihre Bewertung!
Möchten Sie einen Kommentar mit Ihrer Bewertung hinterlassen? Bitte melden Sie sich unten an. Nicht gewünscht? Dann schließen Sie einfach dieses Fenster.

Diskussion (0 Kommentare)