Bluetooth communication between Raspberry Pi and Arduino

Let's play with BlueTooth communication between Raspberry Pi and Arduino
Once again in this project i used the Raspberry PI 0 W.
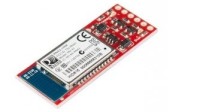
The other part of the project is an Arduino Uno connected to the Sparkfun Bluetooth "Mate Silver" module.
First thing to do is to configure your raspberry according the 'Raspberry Config.pdf' file (see attachments)
Part One : Switching ON/OFF the Arduino build in LED
When the red LED of the Mate Silver stop blinking and the green LED is ON, the Raspberry and the Mate silver are connected, You can now send command 'a' to switch on the Led, command 'b' to switch off the Led or command 'c' to terminate the connection.
If it doesn't work at first time,(LED does not switch ON/OFF), don't panic :
Some explanations :
The secret of the Python script is in these 3 lines :
Part Three : Exploring with Windows
It is possible to do the same thing using Windows.
The main problem is to install correctly the Bluetooth library on the OS, which is less easy with Windows :
The other part of the project is an Arduino Uno connected to the Sparkfun Bluetooth "Mate Silver" module.
First thing to do is to configure your raspberry according the 'Raspberry Config.pdf' file (see attachments)
Part One : Switching ON/OFF the Arduino build in LED
- Connect the Mate Silver to the Arduino according the the "Arduino_BT_01.jpg" file (see attachments).
- Power and program the Arduino with the 'BlueTooth_Test_02.ino' script using the Arduino IDE
- On the Raspberry, create a folder named 'Python' and copy the file 'BT_05.py'.
- In command line, execute the file ' BT_05.py ' : python3 BT_05.py
When the red LED of the Mate Silver stop blinking and the green LED is ON, the Raspberry and the Mate silver are connected, You can now send command 'a' to switch on the Led, command 'b' to switch off the Led or command 'c' to terminate the connection.
If it doesn't work at first time,(LED does not switch ON/OFF), don't panic :
- Terminate the connection
- Reset the Arduino
- Reconnect
Some explanations :
The secret of the Python script is in these 3 lines :
sensor_address = '00:06:66:48:56:21'
socket = bluetooth.BluetoothSocket(bluetooth.RFCOMM)
socket.connect((sensor_address, 1))
- The first line defines a variable containing the MAC address ot the Mate Silver. So, you have to replace this address by your device address.
- Second line, a socket (a software interface) is defined. Thanks to this socket, the program will operate the BlueTooth device and protocole of the Raspberry.
- Third line, a connection with the Mate Silver is attempted. In case of failure, a message error is sent by the system. In case of success, the green LED of the Mate Silver is On and the message "Enter a command 'a', 'b' ou 'f'> " will appear on the Lnux consol.
- In attachments, there is also the same program written in C++. See the comments to compile the file.
- For those who want to use a raspberry Pi 3 or 4 with RaspiOS full (with GUI), use the file 'BT_05_GUI.py'. But do not forget to copy the 'Arduino.gif' file an install the Tkinter library using command : sudo apt install python3-tk..
- Connect a potentiometer (10 k Ohm) to the Arduino according the the "Arduino_BT_02.jpg" file (see attachments).
- Power and program the Arduino with the 'BlueTooth_Test_04.ino' script using the Arduino IDE
- On the Raspberry, copy the file 'BT_06.py'.
- In command line, execute the file ' BT_06.py ' : python3 BT_06.py
- When connected, move the cursor of the potetiometer from left to right : The value displayed on the Linux consol varies from 0 to 1023.
Part Three : Exploring with Windows
It is possible to do the same thing using Windows.
The main problem is to install correctly the Bluetooth library on the OS, which is less easy with Windows :
- Download the .'whl' files accordind your Python version (In attachments, i placed the files for Python 3.6 and 3.7, 64 bits - Otherwise, you'll have to search on the web the file matching with your Python version)
- Copy this file in a folder
- Open the Windows consol (use "cmd" command)
- Go to the folder (use the "cd" command)
- Install the library using the command : pip3 install PyBluez-0.22-cp36-cp36m-win_amd64.whl
- If needed, install pip for Python 3.


Updates des Autors