


Getting LoRaWAN working with STM32WL55 and Radiolib
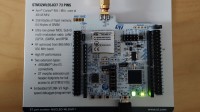
Following project shows how to get LoRaWAN working on the STM32WL55 using Arduino and RadioLib
Intro"to a man with a hammer, everything looks like a nail", no matter who this proverb is attributed to - its definitely something I can support. That saying becomes even worse when you think of the most important rule of engineering: "every tool's a hammer" (which is, by the way, the title of the autobiography of the awesome Adam Savage - but thats on another note ;)). As I do not want to resort to solving every issue the same way, I am very happy that a lot of different websites like Hackster, Elektor, etc do put up some engineering challenges from time to time, needing to solve something using a specific hardware product - usually along the lines of getting a sample sent via mailbox. I love these challenges - you widen your horizon, getting a new tool into your toolbox along the way - and learn a thing or two. This time, the challenge was doing something useful with the STM32WL55 discovery kit. Quite an interesting piece of hardware, basically a small SDR transceiver allowing to be used along a lot of different radio formats within the ~868 MHz area - just by changing the firmware. The bottom line of the contest info was "that thing does not support LoRaWAN" - and that got me thinking. Some months ago I did the little challenge of getting the RAK11300 - an SX1262 modem with RP2040 microcontroller working via RadioLib / "speaking" LoRaWAN. Actually, it was not me really getting the logic written - that were both RadioLibs maintaner jgromes and a contributor by the name of StevenCellist. They wrote most of the LoRaWAN code - I just destroyed a RAK11300 under a microscope and pieced together information from other repos and webpages to understand how the RP2040 was connected to the modem - and how to use it in the context of RadioLib. In the end, this worked out great... so... well, I thought "If this module cannot be used with LoRaWAN - would that not be a nice challenge, seeing if we can do the same thing with it as with the RAK11300?". Entering that simple idea actually ended in Elektor sending me over a piece of that hardware (thanks! :)) and I started looking around how I could get that radio working, thinking that maybe someone had already played around with that idea. And I was not disappointed.
Requirements
stm32duino (2.8.0)Looking at the STM32 Core for Arduino (https://github.com/stm32duino/Arduino_Core_STM32) one can easily find out that the STM32WL55/STM32WL55JC in form of the used Nucleo WL55JC1 board has been supported by this board support package since version 2.1.0. Nice, that means we can use this to get at least the microcontroller working already. Regarding the modem/radio however - there is a discouraging remark: "LoRa support not available". STM32 has its own LoRa support BSP available which can be added - however, as this seems not to support the modem in the WL55 (yet), this remarks makes sense. Time to look for support from other directions.
RadioLibRadioLib is an awesome library which aims to support as many radios available in the Arduino context and make them useable, no matter the context/protocol. Some months ago, there was finally the addition of LoRaWAN support ( https://github.com/jgromes/RadioLib/pull/867 ) - which is still improved upon each day. Actually so much that while I am writing this article, the RadioLib version 6.4.2 - which will be needed to get this working - is currently being tested by CI/CD and pushed to the RadioLib repo. The good thing about the universal LoRaWAN implementation is that it just additionally needs the support of the modem - and the knowledge of how to physically speak to it. The first one was taken care of by this issue ( https://github.com/jgromes/RadioLib/issues/588 ). The later one (how to enable and use them modem itself) - was described here ( https://github.com/jgromes/RadioLib/discussions/775 ).
Putting everything together
Now, all that is left to do is to change the example to match our hardware:
1.) Use the correct modem:
At the start, remove the SX1278 definition
and replace it with the one for the Lx series radio:
2.) Set the correct area:
Just beneath that information is the region configuration:
3.) Add the RFswitch definition: RadioLib needs to know how the different RFswitches are setup, e.g. which GPIO to pull where to get the radio to actually send or receive information. This information needs to be added below the STM32WLx_Module definition and looks like that:
4.) Use the RFswitch: Adding the definition is good, however RadioLib also needs to know that it shall actually use it. This is done by adding following after the Serial.begin(9600); in the setup area:
5.) Activation / LoRaWAN connection: To actually use the LoRaWAN connection there are two options: Either just connect to a LoRaWAN endpoint using OTAA - or restore the last session from the virtual EEPROM of the STM32 and use that. To easily start the setup, just modify the joinEUI, devEUI, nwkKey and appKey to reflect the ones you created for your device. Afterwards you can store the changes, compile and upload the project to the board.
The result will be the board booting, joining the network, sending a Hello World every minute - and listens in for any downlinks sent towards your board.
You can find a full example including the useful addition to restore a previous LoRaWAN connection (e.g. after sleep or reboot) without the need to redo the OTAA in the links.
Thanks again to the overall community making it this easy to getting this board working.
Requirements
- STM32WL55 Nucleo-64 board (https://www.st.com/en/microcontrollers-microprocessors/stm32wl55jc.html)
- Arduino Software (https://www.arduino.cc/en/software)
- stm32duino BSP (2.8.0 / https://github.com/stm32duino/Arduino_Core_STM32/)
- RadioLib Library (6.4.2 / https://github.com/jgromes/RadioLib/)
- A self-hosted LoRaWAN gateway or access to TTNv3
stm32duino (2.8.0)Looking at the STM32 Core for Arduino (https://github.com/stm32duino/Arduino_Core_STM32) one can easily find out that the STM32WL55/STM32WL55JC in form of the used Nucleo WL55JC1 board has been supported by this board support package since version 2.1.0. Nice, that means we can use this to get at least the microcontroller working already. Regarding the modem/radio however - there is a discouraging remark: "LoRa support not available". STM32 has its own LoRa support BSP available which can be added - however, as this seems not to support the modem in the WL55 (yet), this remarks makes sense. Time to look for support from other directions.
RadioLibRadioLib is an awesome library which aims to support as many radios available in the Arduino context and make them useable, no matter the context/protocol. Some months ago, there was finally the addition of LoRaWAN support ( https://github.com/jgromes/RadioLib/pull/867 ) - which is still improved upon each day. Actually so much that while I am writing this article, the RadioLib version 6.4.2 - which will be needed to get this working - is currently being tested by CI/CD and pushed to the RadioLib repo. The good thing about the universal LoRaWAN implementation is that it just additionally needs the support of the modem - and the knowledge of how to physically speak to it. The first one was taken care of by this issue ( https://github.com/jgromes/RadioLib/issues/588 ). The later one (how to enable and use them modem itself) - was described here ( https://github.com/jgromes/RadioLib/discussions/775 ).
Putting everything together
- Install the Arduino Environment
- Install the stm32duino BSP
- Install the RadioLib library
- Choose the correct hardware to be used:
- Tools, Board, STM32 board group, Nucleo-64
- Tools, Board part number, Nucleo WL55JC1
- Open the LoRaWAN reference example:
- File, Examples, RadioLib, LoRaWAN, LoRaWAN_End_Device_Reference
Now, all that is left to do is to change the example to match our hardware:
1.) Use the correct modem:
At the start, remove the SX1278 definition
SX1278 radio = new Module(10, 2, 9, 3);
and replace it with the one for the Lx series radio:
STM32WLx radio = new STM32WLx_Module();
2.) Set the correct area:
Just beneath that information is the region configuration:
LoRaWANNode node(&radio, &EU868);make sure it does reflect your LoRaWAN region - or customize it otherwise.
3.) Add the RFswitch definition: RadioLib needs to know how the different RFswitches are setup, e.g. which GPIO to pull where to get the radio to actually send or receive information. This information needs to be added below the STM32WLx_Module definition and looks like that:
// set RF switch configuration for Nucleo WL55JC1
// NOTE: other boards may be different!
//       Some boards may not have either LP or HP.
//       For those, do not set the LP/HP entry in the table.
static const uint32_t rfswitch_pins[] =
                         {PC3,  PC4,  PC5};
static const Module::RfSwitchMode_t rfswitch_table[] = {
  {STM32WLx::MODE_IDLE,  {LOW,  LOW,  LOW}},
  {STM32WLx::MODE_RX,    {HIGH, HIGH, LOW}},
  {STM32WLx::MODE_TX_LP, {HIGH, HIGH, HIGH}},
  {STM32WLx::MODE_TX_HP, {HIGH, LOW,  HIGH}},
  END_OF_MODE_TABLE,
};
4.) Use the RFswitch: Adding the definition is good, however RadioLib also needs to know that it shall actually use it. This is done by adding following after the Serial.begin(9600); in the setup area:
// set RF switch control configuration
// this has to be done prior to calling begin()
radio.setRfSwitchTable(rfswitch_pins, rfswitch_table);
5.) Activation / LoRaWAN connection: To actually use the LoRaWAN connection there are two options: Either just connect to a LoRaWAN endpoint using OTAA - or restore the last session from the virtual EEPROM of the STM32 and use that. To easily start the setup, just modify the joinEUI, devEUI, nwkKey and appKey to reflect the ones you created for your device. Afterwards you can store the changes, compile and upload the project to the board.
The result will be the board booting, joining the network, sending a Hello World every minute - and listens in for any downlinks sent towards your board.
You can find a full example including the useful addition to restore a previous LoRaWAN connection (e.g. after sleep or reboot) without the need to redo the OTAA in the links.
Thanks again to the overall community making it this easy to getting this board working.
Want to build a project?
Bring your design to life with the Elektor PCB Service, powered by Eurocircuits. Upload the project files and order professionally manufactured PCBs or assembled boards through a proven European production platform.
Supporting KiCad, Eagle, Gerber, and ODB++ formats, the service is suitable for everything from prototypes and validation builds to series production and volume manufacturing.
Made in Europe. Fast. Reliable. Professional.
Diskussion (1 Kommentar)