


DIY Customized 8x8 LED Matrix Tutorial (MAX7219 Meets Arduino)
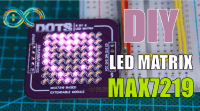
In this step-by-step tutorial, we're diving into the world of electronics and microcontrollers to create a personalized 8 by 8 LED matrix that can be controlled using an Arduino board
In this step-by-step tutorial, we're diving into the world of electronics and microcontrollers to create a personalized 8 by 8 LED matrix that can be controlled using an Arduino board. I'm Chris, and I'll walk you through the entire process, from designing the circuit and assembling the components to programming mesmerizing animations. So, let's roll up our sleeves and get started on this exciting DIY project!
Materials and Tools You'll Need:
Our journey doesn't end here. The possibilities are limitless. This module can be extended to interface with other modules, creating a dynamic and interactive system. Stay tuned for future projects where I explore these exciting expansions and take our LED matrix project to new heights.
With a blend of meticulous circuit design, careful assembly, and creative programming, we've brought our customized 8 by 8 LED matrix to life. I hope you've enjoyed this tutorial as much as I've enjoyed guiding you through it.
Materials and Tools You'll Need:
- MAX7219 Display Driver
- 64 LEDs (0603 package)
- Arduino Board
- 10K Ohm Resistor
- Solder Paste and Stencil
- Hot Plate and Hot Air Gun
- Male Header Pins
- Altium Designer (for schematic and PCB design)
- Flux Removal Solvent
- Matrix VCC to Arduino VCC
- Matrix GND to Arduino GND
- Matrix Din to Arduino D11
- Matrix CS to Arduino D10
- Matrix CLK to Arduino D13
Our journey doesn't end here. The possibilities are limitless. This module can be extended to interface with other modules, creating a dynamic and interactive system. Stay tuned for future projects where I explore these exciting expansions and take our LED matrix project to new heights.
With a blend of meticulous circuit design, careful assembly, and creative programming, we've brought our customized 8 by 8 LED matrix to life. I hope you've enjoyed this tutorial as much as I've enjoyed guiding you through it.
Want to build a project?
Bring your design to life with the Elektor PCB Service, powered by Eurocircuits. Upload the project files and order professionally manufactured PCBs or assembled boards through a proven European production platform.
Supporting KiCad, Eagle, Gerber, and ODB++ formats, the service is suitable for everything from prototypes and validation builds to series production and volume manufacturing.
Made in Europe. Fast. Reliable. Professional.
Diskussion (0 Kommentare)