
Count faces by YOLO8 on MaixCam board

Step into the future of crowd analytics with our AI-powered face-counting system, designed for open gatherings where entry gates don’t exist. Using a pre-trained YOLOv8 model on the compact yet powerful MaixCam, it counts engaged faces every few minutes and logs the data with precise timestamps. Forget manual counters—this system gives you real-time insight into your audience’s attention with just a glance. With onboard logging, SSH access, and GPIO expandability, it’s intelligent, cost-effective solution.
Count faces by YOLO8 on MaixCam board
Introduction: Back in 1991, I was in New Delhi visiting the iconic Lotus Temple (Bahá’í House of Worship). The temple’s breathtaking architecture, resembling a fully bloomed lotus with its delicately spread petals, was truly mesmerizing.
At the time, the temple had four gates—two for entry and two for exit. At each entry gate, two stewards stood with manual tally counters in their hands. Each time a visitor entered, they pressed the lever of their handheld device, incrementing the count by one. At the end of the day, the totals from both counters were summed up to determine the exact number of devotees who had visited the temple.
Gone are the days of manual tally counters! Today, we have various electronic solutions for tracking human entry, such as PIR sensors, IR sensors, and even AI-powered face detection.
AI-based counters can detect faces and increment the count automatically—simple and efficient! However, in this project, we’re taking a different approach. Imagine you’re addressing a gathering in an open space where there is no gate as such to manage entry or exit and want to know exactly how many faces are engaged in your speech. Then once in 5 minutes it will recheck & dump the data with date-time in a text file which you may retrieve from MaixCam using ssh or scp.
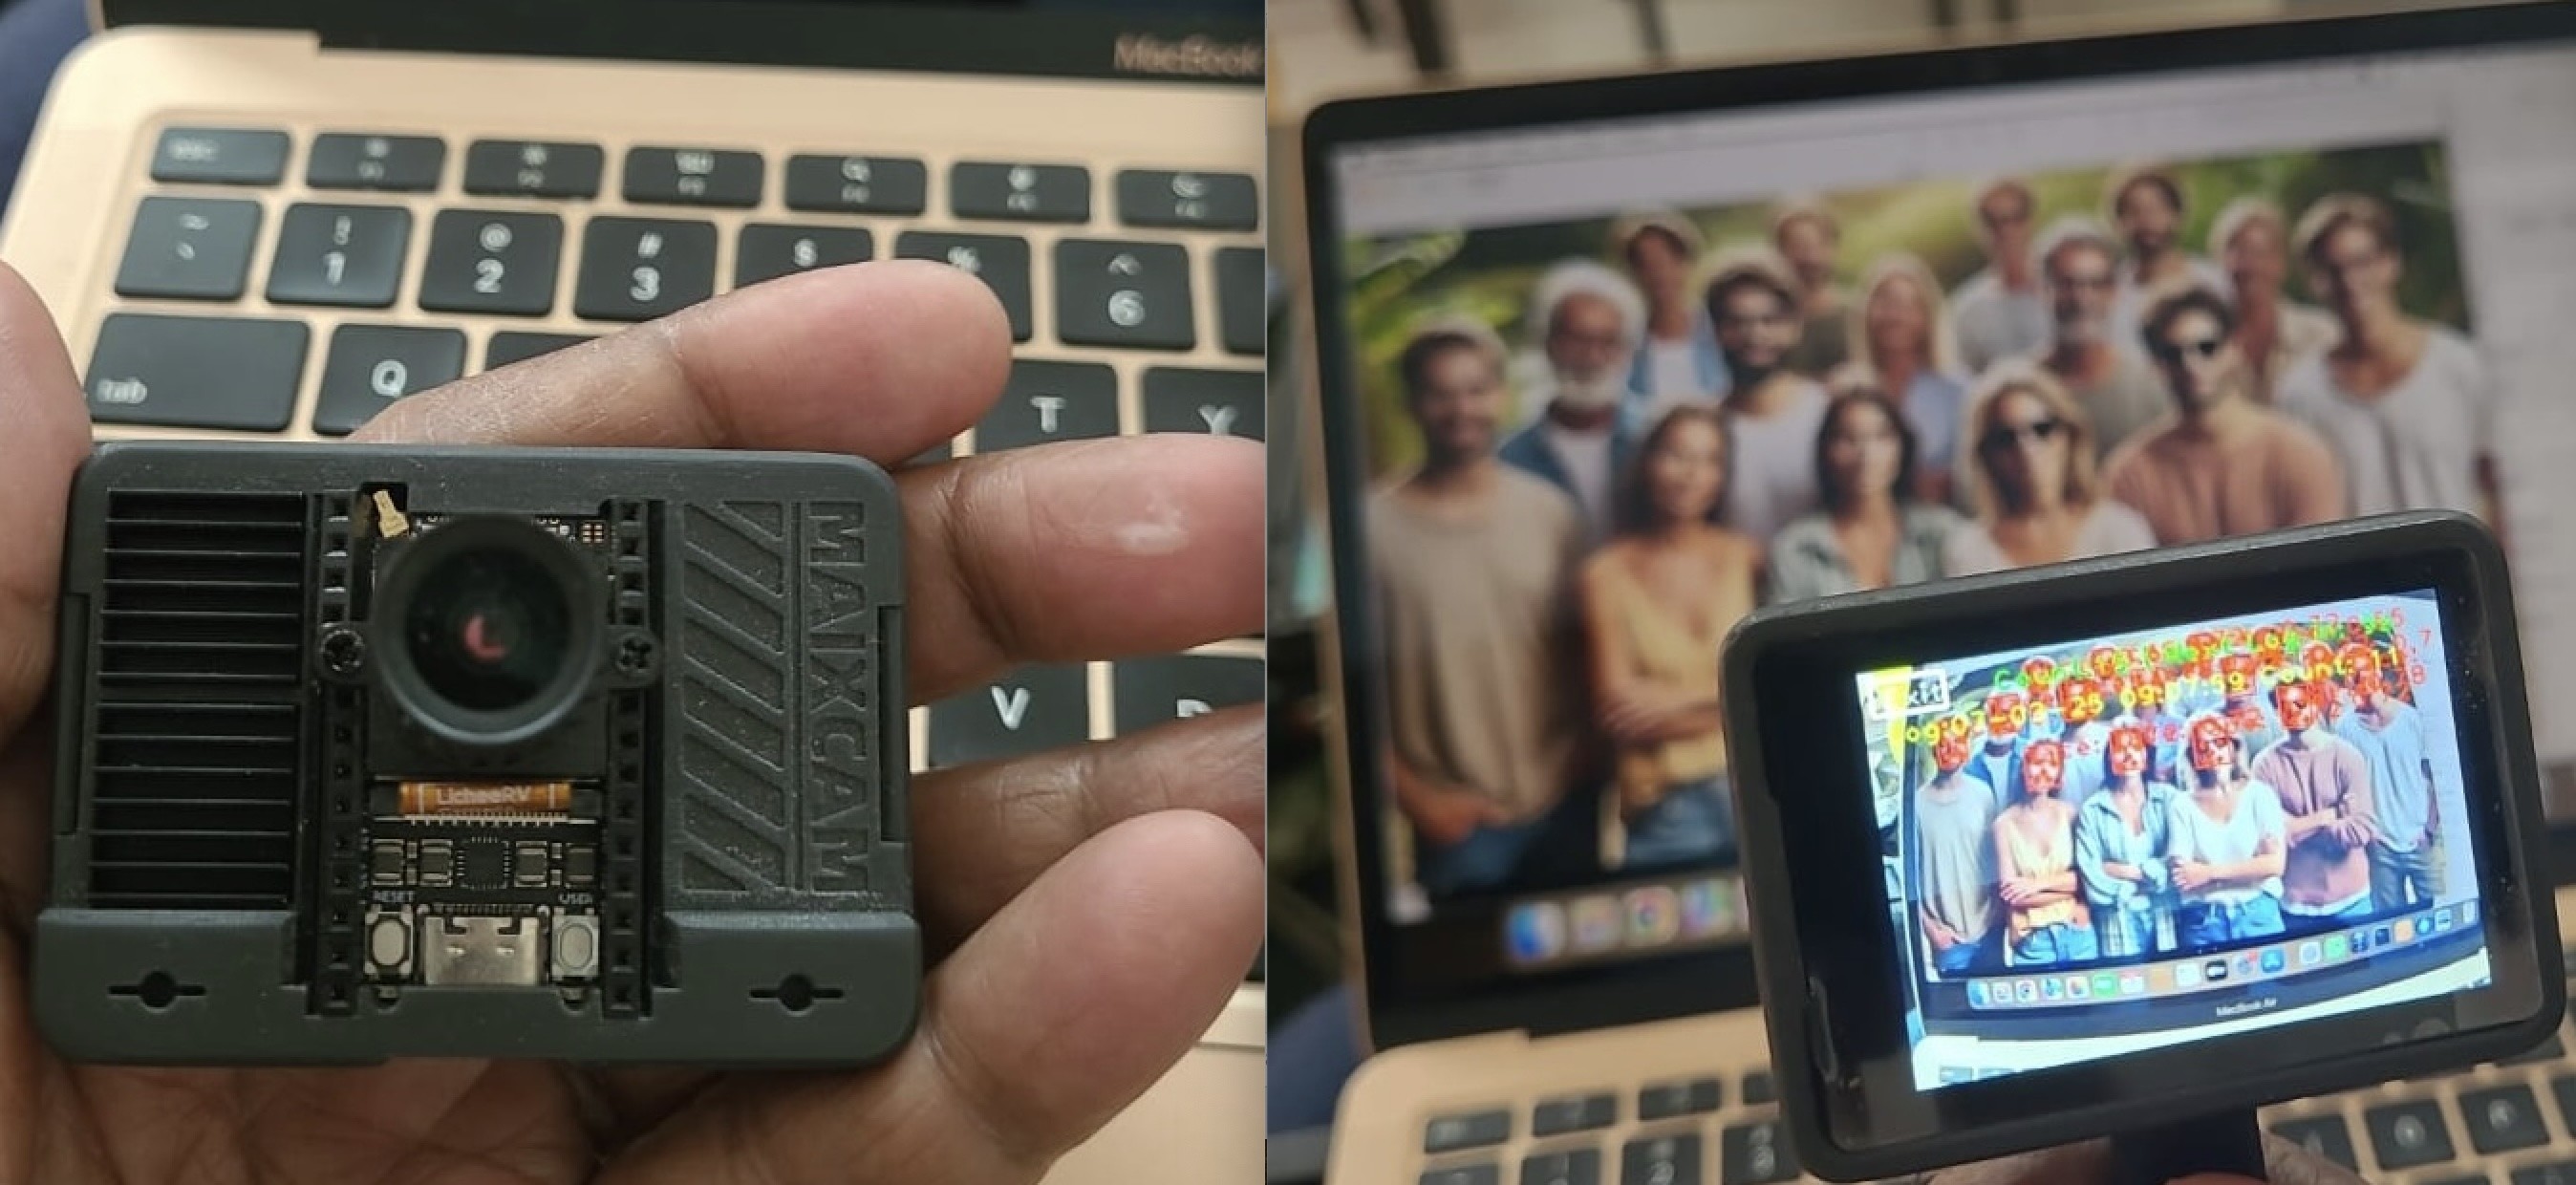
MaixCam’s loaded with our intelligence, a single glance at the audience is enough—it instantly counts the number of captivated faces, giving you real-time insight into your audience’s engagement!
Working principle: We have a pre trained YOLOv8 model yolov8n_face.mud which does the actual sifting through the myriad images to identify the correct one. The python code is used to finalise the followings:
- It shows the instant count value,
- It logs data in every minute [changeable] in a /root/models/faces.txt with date-time stamp
- It shows a count down timer for the next logging to start.
- On top left it shows “Exit” button for exiting the program
*** The code works only when faces are seen. If somebody wears a full face mask or looks backward, it will not detect.
*** The model is different from person detection. A person can be detected without his face looking directly
Additional GPIOs can be used to run other associated relays, LEDs etc. as per your choice.
The faces.txt is a simple text file and here’s the content of faces.txt file
The faces.txt is a simple text file and here’s the content of faces.txt file
06-03-25 08:39:11 Count: 1
06-03-25 08:40:11 Count: 1
06-03-25 08:43:38 Count: 35
$> scp root@192.168.109.112:/root/models/faces.txt faces.txt
06-03-25 08:40:11 Count: 1
06-03-25 08:43:38 Count: 35
$> scp root@192.168.109.112:/root/models/faces.txt faces.txt
[This will download the faces.txt file from MaixCam into you Laptop’s current directory as faces.txt name. The IP address may change as per your network ]
Hardware: AI processing requires raw computing power. Running on Micro controller board may not be prudent always. Raspberry Pi 5 with 8 GB RAM is great. Even greater if you add a AI processor HAT on top of it [13 TOPS] because YOLO requires lots of calculations for processing. But this Sipeed Chinese micro controller has the following specifications - Dual core: CPU Big Core: 1GHz RISC-V C906 / ARM A53, CPU Small core: 700 MHz RISC-V C906 / ARM A53, NPU: 1TOPS@INT8 [1 TOPS = 1 Trillion (10¹²) operations per second], 256MB DDR3 RAM, TFT touch screen, SDCard, Microphone for sound in, 5M Camera and WiFi is just good enough to run the face-counting model besides it’s priced at a very attractive rate - robu.in [INR:7K], aliexpress.com [USD $50], alibaba.com, amazon.in [INR:12K]
Operating System: The MaixCam runs a lightweight, tailor-made Linux-based operating system designed specifically for Kendryte K210 boards. Key features include: Integrated support for YOLOv8, Headless mode for efficient remote operations, Python 3.11 for scripting and automation, SSH Daemon for secure remote access. This setup is ideal for real-time face recognition, making it a great choice for entry-level AI projects or lightweight edge AI systems.
The GPIO map is presented here. However, we are not using any GPIOs in our code.
Hardware Setup: This board Sipeed MaixCam is a compact AI-focused microcontroller originating from China. Detailed information about the board is available on the official Sipeed Wiki site [https://wiki.sipeed.com/hardware/zh/maixcam/index.html ]. Although the website is primarily in Chinese, modern translation tools like Google Translator can help you navigate and understand its content effectively.
If you’re skeptical about Chinese-made boards, consider the example of the ESP32—also originally from China. Today, the ESP32 has arguably surpassed the popularity of the Arduino UNO in many applications due to its versatility and robust performance. Similarly, the MaixCam stands out for its quality and features, making it a reliable choice for AI applications.
Things into perspective: Running the same computing load on a Raspberry Pi 5 (8GB) requires additional components like a TFT display, keyboard, and a power supply capable of delivering at least 3A @ 5V, significantly increasing the overall cost. In contrast, the MaixCam is compact, runs on a standard mobile charger, and provides GPIO pins for additional operations—all in a highly cost-effective package. MaixCam has a Pro version which has NPU ~3 TOPs and capable of more demanding tasks.
The MaixCam series is designed for edge AI applications. Its compact size, efficient power usage, and integrated GPIO support makes it an excellent choice for projects like fall detection , face recognition or YOLO object detection. Whether you choose the MaixCam or MaixCam Pro, both boards deliver impressive performance for AI workloads, proving that good things do come in small packages!
Connecting & setting Up the Maixcam: To get started, download the latest MaixCam operating system from the release page [https://github.com/sipeed/MaixPy/releases]. However, in most cases, the board you purchased will already have an operating system installed. If so, you only need to connect the board to your computer. There are three main ways to connect the board to your computer: (1) USB direct connection, (2) Though SSH and (3) Using Maixvision IDE [https://wiki.sipeed.com/maixvision ] for a more visual & integrated experiences.
For uploading the OS - Either you open the board back cover, remove the SDCard, upload the OS and then reinsert the SDCard back or do it without opening the back cover by pressing the user button and then inserting the USB cord into the computer. You may have to press the ‘user’ button few more times until the MaixCam appears as a USB drive labeled ‘boot’ in your “My Computer” page. Use “balenaEtcher” or any similar software to transfer the OS image to the MaixCam drive.
Once the OS is transferred, now remove the USB plug and the MaixCam will display the opening page on the TFT. Using your finger, press the ‘Settings”, find “WiFi” connections, Scan the network and connect it using the password. After connecting to WiFi, the MaixCam may prompt you to download the ‘MaixPy runtime’. Follow the on-screen instructions to complete this step and then play with the other icons on the TFT to understand the board better.
MaixVision IDE and SSH Setup: On the left side of the screen, you’ll find the MaixVision IDE. On the right side, MaixVision, you can either use SSH or GFTP (Graphical FTP) to interact with the board. Alternatively, you can SSH directly from the command prompt of your computer using: ssh root@192.168.82.112 [get the IP address from your router] when it asks for password it will be ‘root’. Many sample projects are available at https://maixhub.com/app/ However, note that many of the projects are in Chinese, and the help files are often lacking.
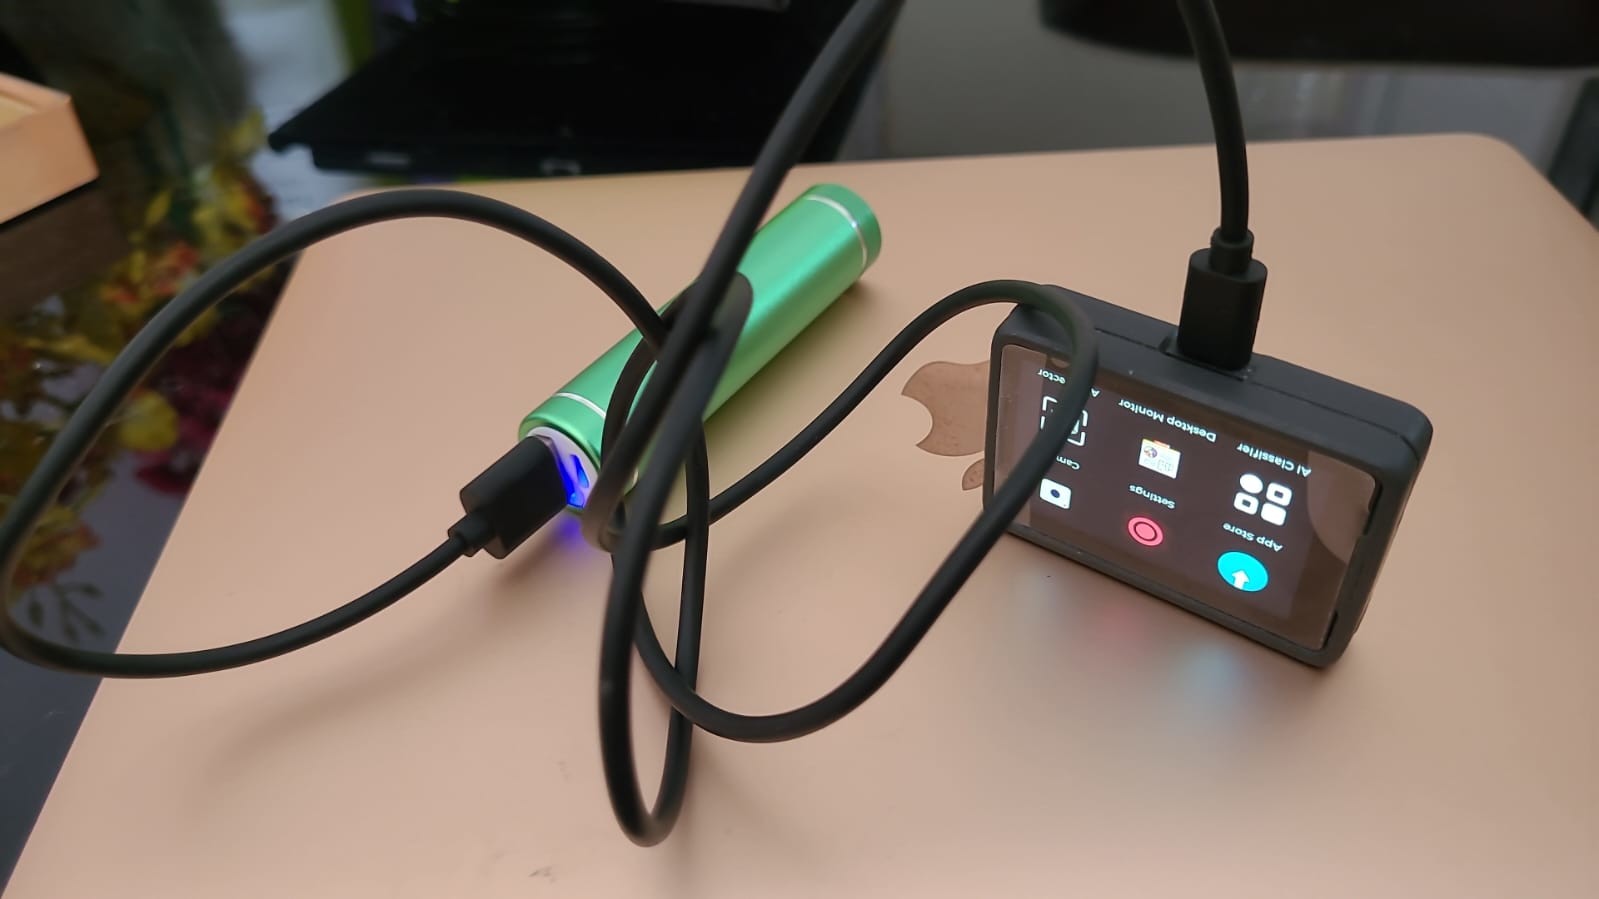
Portability: On an 18650 Li-Ion 2500 mAh cell the device can run more than 2 hours.
Uploading: After doing the ssh into the board [ssh root@192.168.82.112, password “root”] you can scp to upload the file [scp main.py root@192.168.82.112:/root/main.py]. However, the best way to do this is to install MaixVision IDE onto your computer and then do it inside the MaixVision. On the right side of MaixVision IDE, you will find “Device file manager”, select the drive where you want to upload and then simply press the button. One note of caution, never try to upload anything into the “/boot” directory of the device, it may spoil the operating system and end up transfering the image file again.
Running the code from MaixVision IDE is pretty simple. Just get the MaixCam connected to your WiFi. Connect the MaixCam by pressing the ‘connect’ icon on the bottom left and then press the ‘play’ button on the bottom left side. The code will start playing out now!
Boot start: This is something different from other Sipeed boards where you just drop the code in the device as boot.py and it starts auto running. Here you have to do this way - Go to left side bottom of MaixVision IDE, Find the ‘Package’ button and make a package of your code. Provide all the data like - id, name, version, developer, description etc. Then submit and finally install it.
This will create a ink in the /maixapp/apps/app.info file with your given_name and a folder named ‘face_count’ inside /maixapp/apps/ which will have 3 files one of them being main.py [which is nothing but your face_count.py ]
Now in the /maixapp/auto_start.txt file just enter your code - face_count & save the file. This file should not have any other entry. Disconnect your MaixCam board, your code will autostart. On the contrary after doing ‘install’ you can do this thing from the touch screen menu of MaixCam by - Settings -> Start-menu->Face_count. Now restart , the Face_count program will be auto start. To stop the code, press the ‘Exit’ button on the top left of the screen.
Attachment: face_count.py, app.jpg & yolov8n_face.mud. Transfer the app.jpg, and yolov8n_face.mud file into the /root/models/ of the MaixCam board.
Photographs & Prototype: While I have tested my project on real people for authentic results, due to privacy concerns, I have used AI-generated images for demonstration. Some of these images, along with my prototype, are showcased here.
Aftermath: MaixCam stands out as an exceptionally powerful MCU board from China, offering an impressive blend of compactness & functionality. Competing boards like the ESP32S3 CAM, ESP32 CAM, Arduino Nicla Vision, and LilyGo T-Cam may face an existential threat due to its capabilities. In fact, MaixCam even has the potential to challenge the Raspberry Pi 5 in AI-driven projects.
The rapid lifecycle testing, aggressive innovation, and strategic marketing by Chinese manufacturers have propelled them to the forefront of the industry. Year after year, they continue to disrupt the market with cutting-edge MCU boards that set new benchmarks—a movement that was initially sparked by Espressif’s ESP32 a few years ago.
While India has begun developing its own MCU boards, their cautious pricing strategies and conservative marketing approaches have hindered widespread adoption. Without a shift toward bold innovation and market penetration, these companies risk being overshadowed by yet another groundbreaking product from China.
The mantra for survival should be: innovate aggressively, market fearlessly, and if failure occurs—fail fast, learn, and launch the next breakthrough.
Note: Images are AI generated that are used in demo.
Note: Images are AI generated that are used in demo.
Bye, bye
S. Bera
Pics & Prototype:
Diskussion (1 Kommentar)